
Six configurable data fields
← All watch faces
Watch face for Garmin
Crosswind
Hybrid Tactical
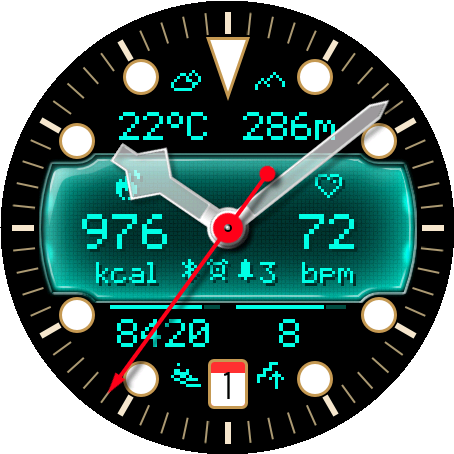
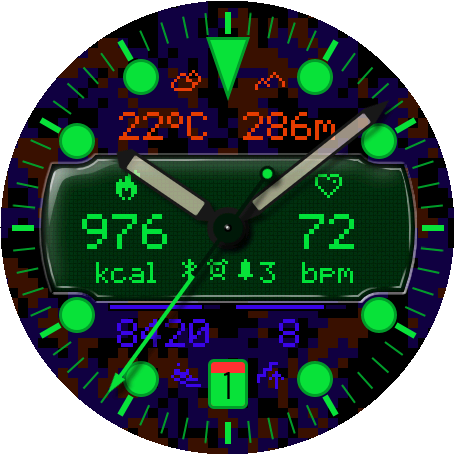
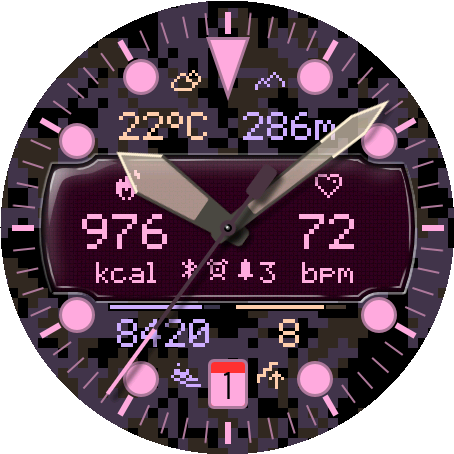
Analog soul. Digital intelligence.
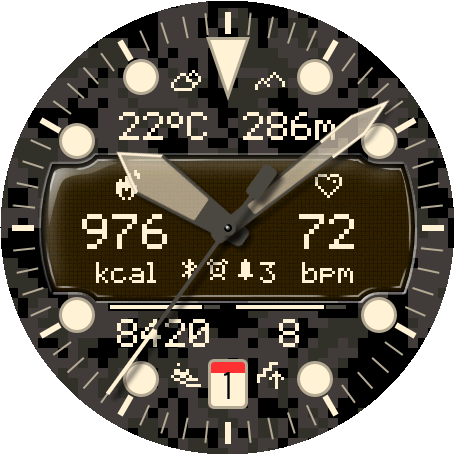
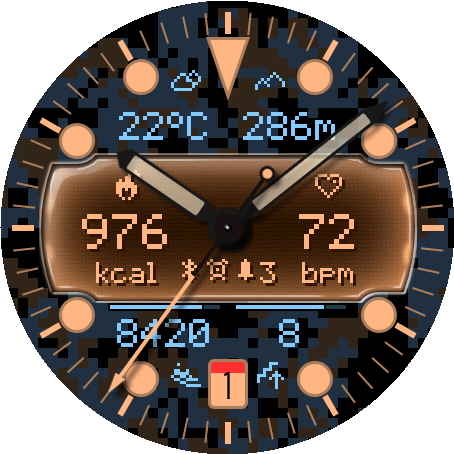
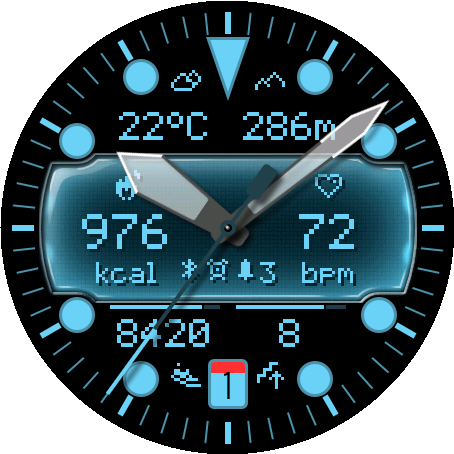
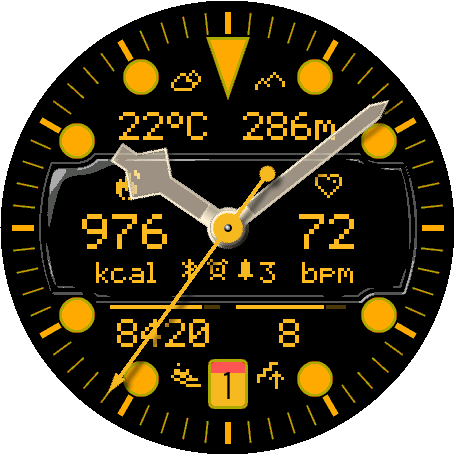
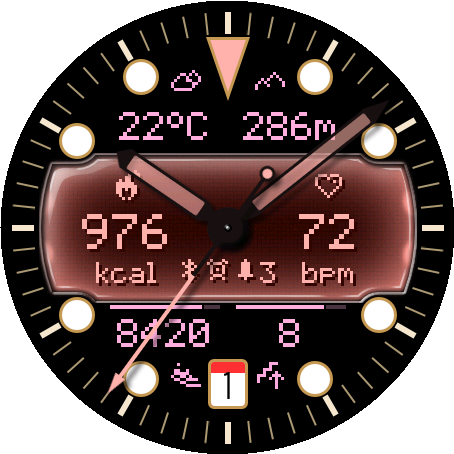
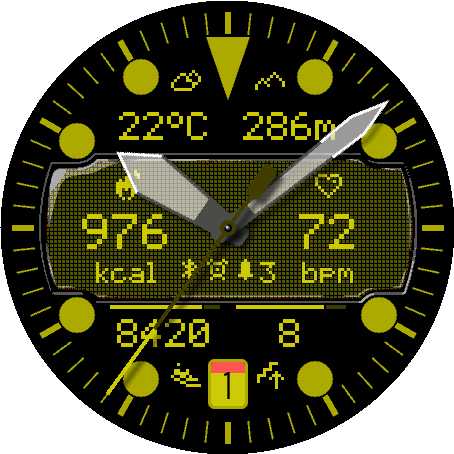
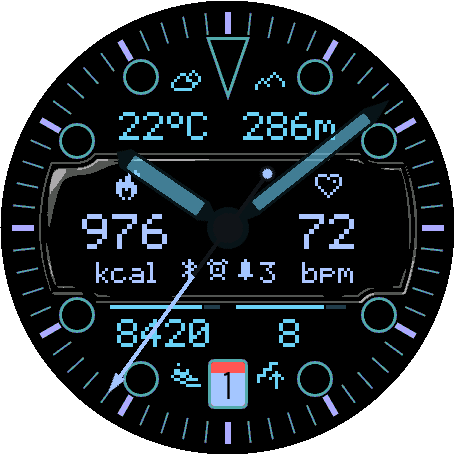
A premium analog watch face with aviation-inspired styling and a distinctive retro digital display. Customize six data fields with more than 60 health, activity, training, weather, astronomical, and system metrics, then fine-tune the colors, hands, markers, layout, background, touch shortcuts, and Always-On Display. Built for smooth, efficient performance without compromising on information or personality.
Supported devices56
 Approach® S70 42mmAMOLED · 390 × 390
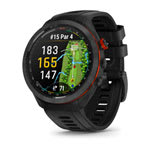 Approach® S70 47mmAMOLED · 454 × 454
 D2™ Air X15AMOLED · 454 × 454
 D2™ Mach 1AMOLED · 416 × 416
 D2™ Mach 1 ProAMOLED · 454 × 454
 D2™ Mach 2AMOLED · 454 × 454
 D2™ Mach 2 ProAMOLED · 454 × 454
 Descent™ Mk3 43mmAMOLED · 390 × 390Descent™ Mk3i 43mmAMOLED · 390 × 390
 Descent™ Mk3i 51mmAMOLED · 454 × 454
 epix™ (Gen 2)AMOLED · 416 × 416
 epix™ Pro (Gen 2) 42mmAMOLED · 390 × 390
 epix™ Pro (Gen 2) 47mmAMOLED · 416 × 416epix™ Pro (Gen 2) 51mmAMOLED · 454 × 454
 fēnix® 8 43mmAMOLED · 416 × 416
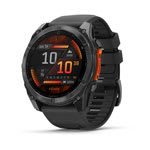 fēnix® 8 47mmAMOLED · 454 × 454fēnix® 8 51mmAMOLED · 454 × 454
 fēnix® 8 Pro 47mmAMOLED · 454 × 454fēnix® 8 Pro 51mmAMOLED · 454 × 454fēnix® 8 Pro MicroLEDAMOLED · 454 × 454
 fēnix® 9 43mmAMOLED · 416 × 416
 fēnix® 9 47mmAMOLED · 454 × 454fēnix® 9 51mmAMOLED · 454 × 454
 fēnix® 9 Pro 43mmAMOLED · 416 × 416
 fēnix® 9 Pro 47mmAMOLED · 454 × 454
 fēnix® 9 Pro 51mmAMOLED · 466 × 466
 fēnix® EAMOLED · 416 × 416
 Forerunner® 170AMOLED · 390 × 390
 Forerunner® 170 MusicAMOLED · 390 × 390
 Forerunner® 265AMOLED · 416 × 416
 Forerunner® 570 42mmAMOLED · 390 × 390
 Forerunner® 570 47mmAMOLED · 454 × 454
 Forerunner® 965AMOLED · 454 × 454
 Forerunner® 970AMOLED · 454 × 454
 MARQ® (Gen 2) AdventurerAMOLED · 390 × 390MARQ® (Gen 2) AthleteAMOLED · 390 × 390
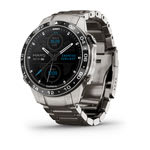 MARQ® (Gen 2) AviatorAMOLED · 390 × 390MARQ® (Gen 2) CaptainAMOLED · 390 × 390MARQ® (Gen 2) Carbon EditionAMOLED · 390 × 390MARQ® (Gen 2) Commander – Carbon EditionAMOLED · 390 × 390MARQ® (Gen 2) GolferAMOLED · 390 × 390quatix® 7 ProAMOLED · 416 × 416quatix® 7 SapphireAMOLED · 416 × 416quatix® 8 47mmAMOLED · 454 × 454quatix® 8 51mmAMOLED · 454 × 454quatix® 8 Pro 47mmAMOLED · 454 × 454quatix® 8 Pro 51mmAMOLED · 454 × 454tactix® 7 – AMOLED EditionAMOLED · 454 × 454tactix® 8 47mmAMOLED · 454 × 454tactix® 8 51mmAMOLED · 454 × 454
 Venu® 3AMOLED · 454 × 454
 Venu® 3SAMOLED · 390 × 390
 Venu® 4 41mmAMOLED · 390 × 390Venu® 4 45mmAMOLED · 454 × 454
 Venu® X1AMOLED · 448 × 486
 vívoactive® 6AMOLED · 390 × 390
Deep color and layout customization
Battery-friendly Always-On Display
User guide
Make it yours
Choose where you want to configure the watch face, then jump directly to any setting.
On the watch
Appearance
Colors, dial rendering, hands, markers, the digital window, and outer data.
1.1
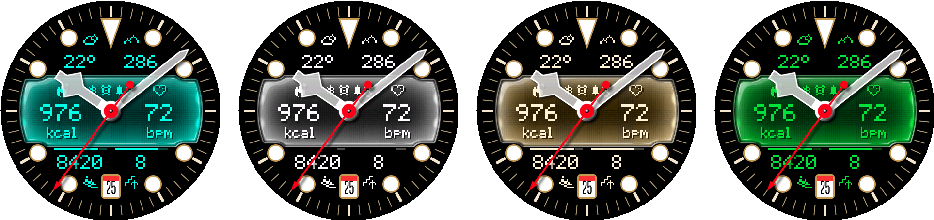
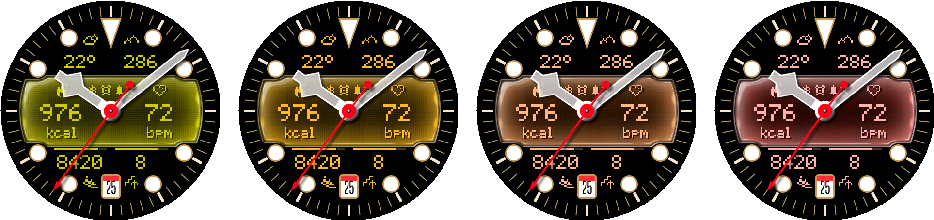
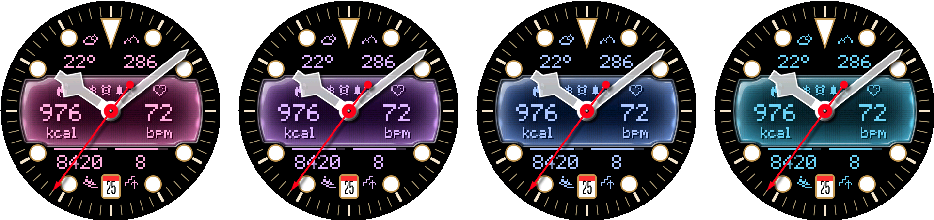
Accent Color
Sets the primary highlight used throughout the dial.
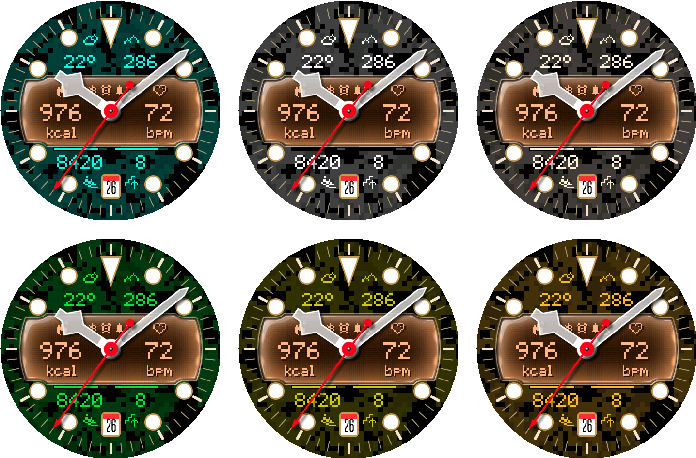
Options: Teal, White, Warm White, Green, Yellow, Amber, Orange, Coral Red, Pink, Violet, Blue, and Ice Blue.
1.2
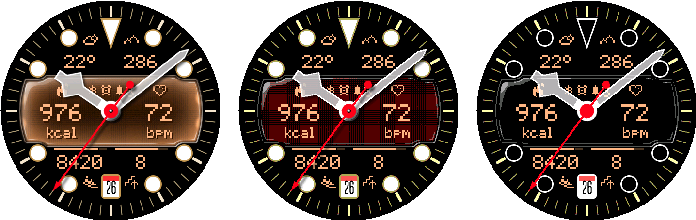
Face Render Mode
Changes the rendering character of the complete dial.
Options: Default, 8-bit, and AOD-like.
1.3
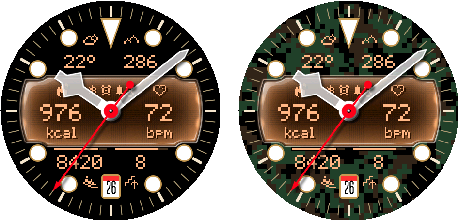
Background
Selects the plain or patterned dial background.
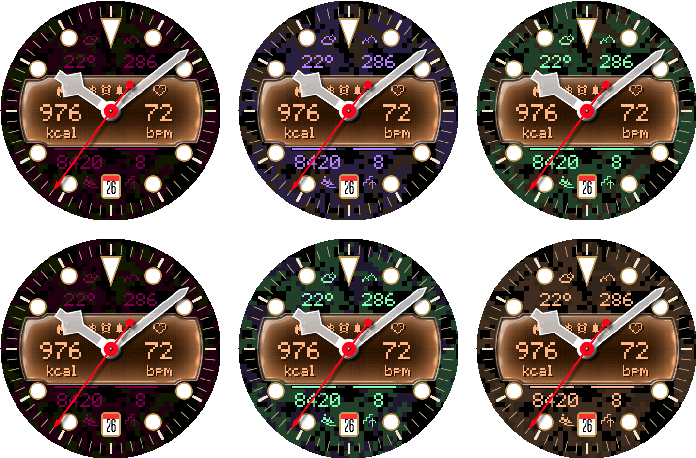
Options: Black and Camo.
1.4
Camo Brightness
Controls the intensity range of the Camo background.
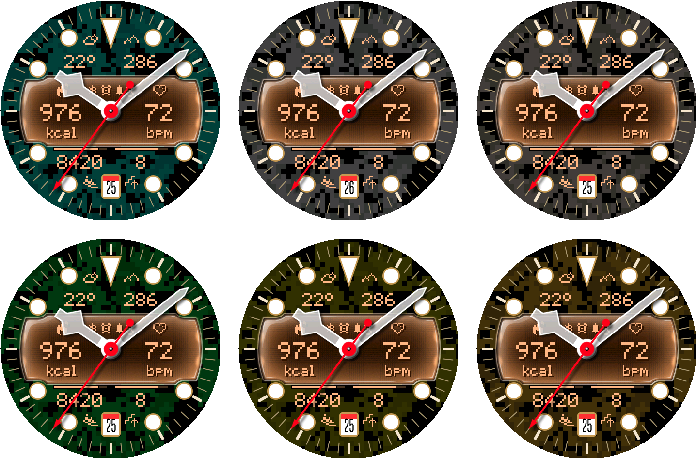
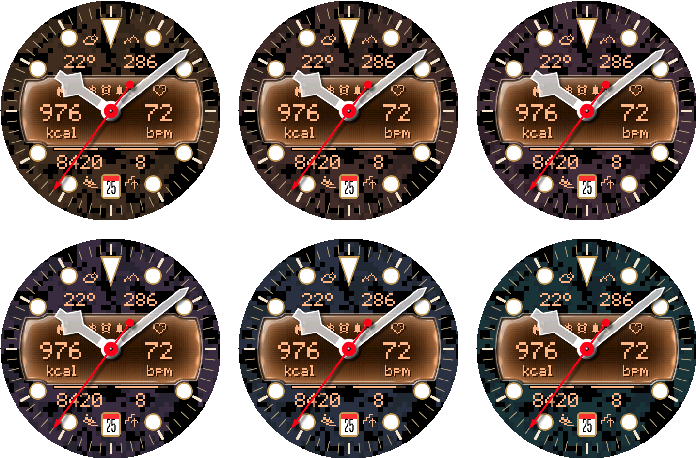
Options: 20–25%, 20–30%, and 25–30%. The setting is visible only when Background is Camo.
1.5
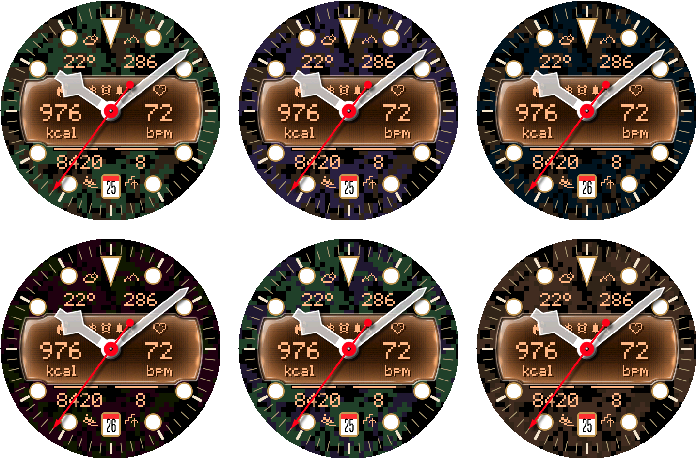
Camo Color Method
Selects how Camo colors are derived from the current Accent Color or chooses a fixed palette color.
The derived methods calculate their Camo color pair from Accent Color. Options: Channel Rotate, Reverse Rotate, Complementary, Split Complementary, Triadic, Monochrome, plus all 12 palette colors. Background must be Camo.
1.6
Hand Style
Selects the shape and visual weight of the hour and minute hands.
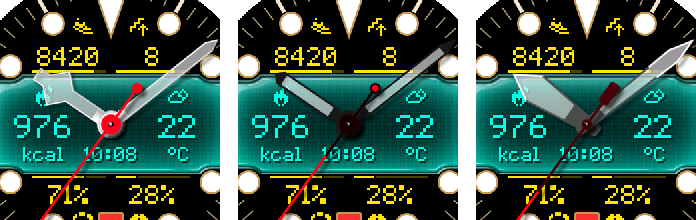
Options: Type 1, Type 2, and Type 3.
1.7
Hour & Minute Hand Color
Sets the shared color of the hour and minute hands.
Options: Teal, White, Warm White, Green, Yellow, Amber, Orange, Coral Red, Pink, Violet, Blue, and Ice Blue.
1.8
Second Hand Color
Sets the seconds hand independently from the main hands.
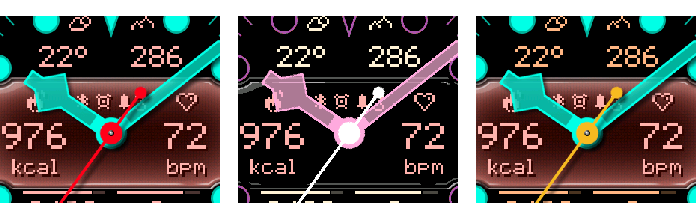
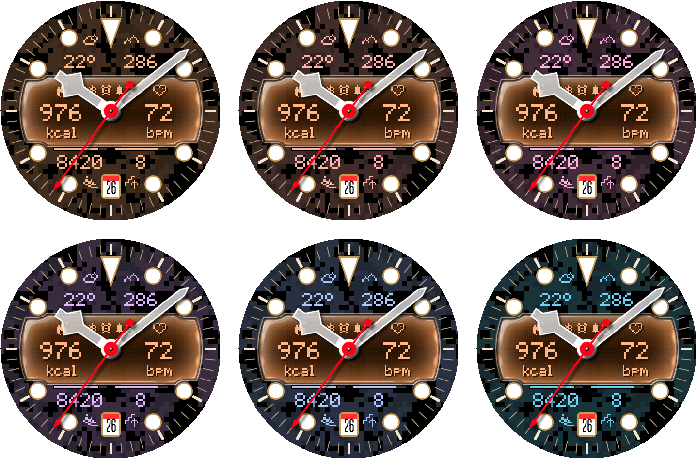
Options: Red, Accent, five Camo-derived methods, and all 12 palette colors.
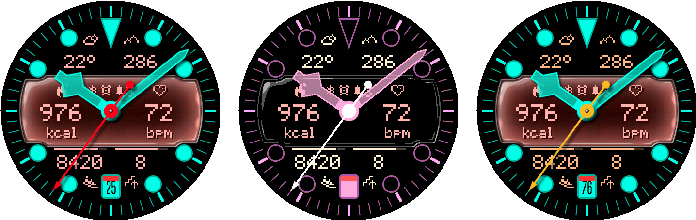
1.9
Lume Marker Color
Sets the color of the luminous hour markers.
Options: Teal, White, Warm White, Green, Yellow, Amber, Orange, Coral Red, Pink, Violet, Blue, and Ice Blue.
See Fig. 1.10 under Second Hand Color for representative marker colors.
1.10
12 o'clock Marker Color
Sets the color of the prominent 12 o'clock marker.
Options: Teal, White, Warm White, Green, Yellow, Amber, Orange, Coral Red, Pink, Violet, Blue, and Ice Blue.
1.11
6 o'clock Marker
Chooses the information shown around the 6 o'clock marker.
Options: Date + Battery, Date, Battery %, Battery gauge, and Simple.

1.12
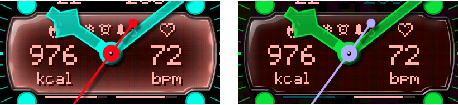
Digital Window Mode
Changes the background intensity of the central digital window.
Options: Default and Darker.
1.13
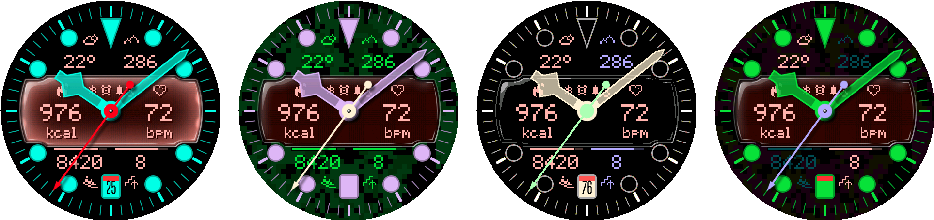
Outer Data Layout
Distributes the color or color pair selected by Outer Data Color across the four outer data slots.
Uniform gives every slot the same color. Top/Bottom gives the two top slots one color and the two bottom slots the other. Left/Right groups the left and right slots. Diagonal gives each opposite diagonal pair the same color.
Options: Uniform, Top/Bottom, Left/Right, and Diagonal.
1.14
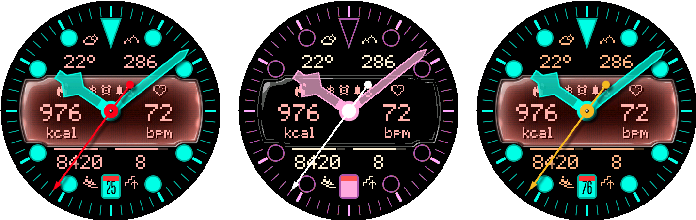
Outer Data Color
Chooses the color or derived color pair used by the outer data slots.
Accent and the 12 fixed palette choices use one color. The five derived methods calculate a color pair from Accent Color; Outer Data Layout then determines how that pair is distributed. Options: Accent, five Camo-derived methods, and all 12 palette colors.
1.15
Data Layer Position
Controls whether data values and icons are rendered below or above the analog hands.
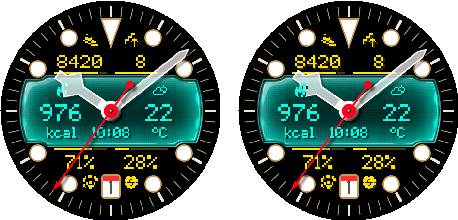
Options: Below Hands and Above Hands. Progress bars always remain below the hands. Above Hands adds a dark color-matched shadow to outer values and icons for legibility.
On the watch
Data
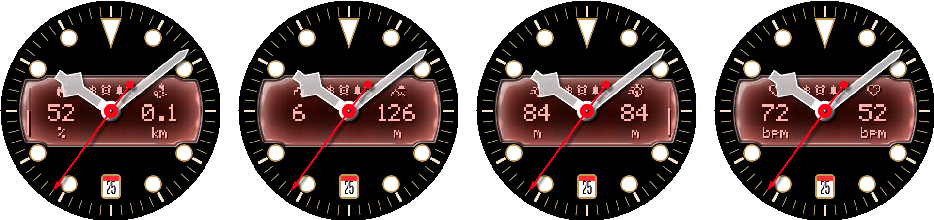
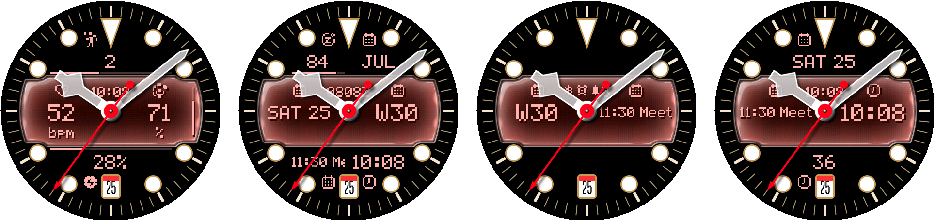
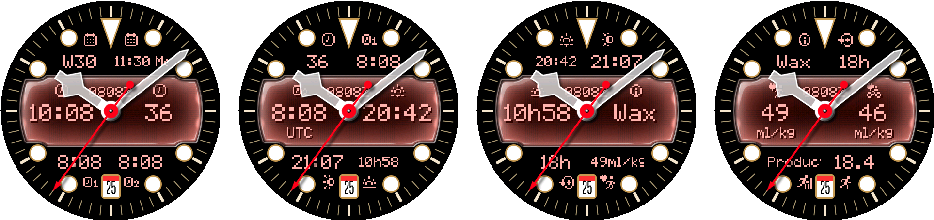
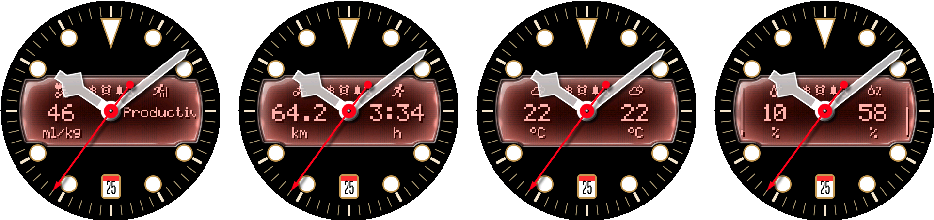
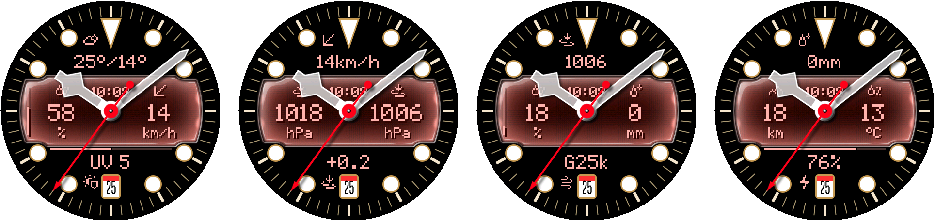
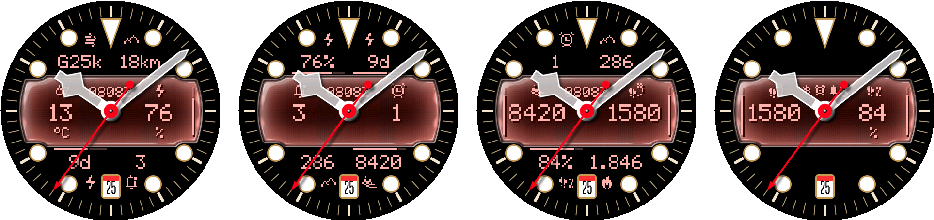
Representative metric categories, row density, six configurable fields, digital-center content, and touch launch actions.
2.1
Touch Enabled
Enables or disables all touch shortcuts.
Options: On and Off.
2.2
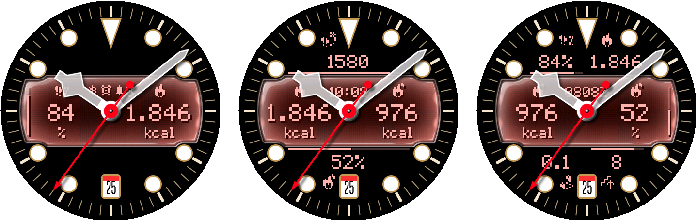
Top Row Mode
Controls how many fields are visible in the top row.
Options: Off, Single, and Double.
2.3
Top Left Field
Chooses the metric shown in the top-left position.
Choose from 63 fields grouped as Activity, Health, Date & Time, Training, Weather, and System. See the shared field catalog at the start of the Data chapter for representative fields from every group.
2.4
Top Left Launch Action
Chooses what opens when the top-left field is touched.
Options include Auto, supported Garmin apps and glances, External Complication, and None where the selected target is unavailable.
2.5
Top Right Field
Chooses the metric shown in the top-right position.
Choose from 63 fields grouped as Activity, Health, Date & Time, Training, Weather, and System. See the shared field catalog at the start of the Data chapter for representative fields from every group.
2.6
Top Right Launch Action
Chooses what opens when the top-right field is touched.
Options include Auto, supported Garmin apps and glances, External Complication, and None where the selected target is unavailable.
2.7
Digital Window Left Field
Chooses the metric shown on the left side of the digital window.
Choose from 63 fields grouped as Activity, Health, Date & Time, Training, Weather, and System. See the shared field catalog at the start of the Data chapter for representative fields from every group.
2.8
Digital Window Left Launch Action
Chooses what opens when the digital-left field is touched.
Options include Auto, supported Garmin apps and glances, External Complication, and None where the selected target is unavailable.
2.9
Digital Window Center
Chooses the content in the center of the digital window.
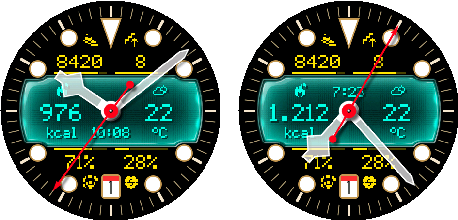
Options: Status Icons, Digital Time, Zulu Time, Date, and Seconds.
The selected content automatically moves between the upper and lower part of the digital window according to the hour and minute hand positions.

2.10
Digital Window Right Field
Chooses the metric shown on the right side of the digital window.
Choose from 63 fields grouped as Activity, Health, Date & Time, Training, Weather, and System. See the shared field catalog at the start of the Data chapter for representative fields from every group.
2.11
Digital Window Right Launch Action
Chooses what opens when the digital-right field is touched.
Options include Auto, supported Garmin apps and glances, External Complication, and None where the selected target is unavailable.
2.12
Bottom Row Mode
Controls how many fields are visible in the bottom row.
Options: Off, Single, and Double. See Fig. 2.07 under Top Row Mode.
2.13
Bottom Left Field
Chooses the metric shown in the bottom-left position.
Choose from 63 fields grouped as Activity, Health, Date & Time, Training, Weather, and System. See the shared field catalog at the start of the Data chapter for representative fields from every group.
2.14
Bottom Left Launch Action
Chooses what opens when the bottom-left field is touched.
Options include Auto, supported Garmin apps and glances, External Complication, and None where the selected target is unavailable.
2.15
Bottom Right Field
Chooses the metric shown in the bottom-right position.
Choose from 63 fields grouped as Activity, Health, Date & Time, Training, Weather, and System. See the shared field catalog at the start of the Data chapter for representative fields from every group.
2.16
Bottom Right Launch Action
Chooses what opens when the bottom-right field is touched.
Options include Auto, supported Garmin apps and glances, External Complication, and None where the selected target is unavailable.
On the watch
Date & Time
Time and date formatting, alternate zones, display offset, and AM/PM.
3.1
Time Format
Controls the formatting of digital time values.
Options: 9:05, 09:05, Military, and Zulu.

3.2
Date Format
Controls how date fields are written.
Options: 5.7., 05.07., 5/7, 05/07, 7/5, 07/05, Day Month, Month Day, Weekday Day, and Day Weekday.

3.3
Alternate Time Zone 1
Sets the UTC offset used whenever a data slot is assigned to the Alternate Time Zone 1 field.
Options run from UTC−12:00 to UTC+14:00 in 30-minute increments.
3.4
Alternate Time Zone 2
Sets the UTC offset used whenever a data slot is assigned to the Alternate Time Zone 2 field.
Options run from UTC−12:00 to UTC+14:00 in 30-minute increments.
3.5
Displayed Time Offset
Moves the displayed hands and regular digital time ahead without changing the device clock.
Zulu time always shows actual UTC and does not use this offset. Options: +0, +5, +10, +15, +20, +25, and +30 minutes.
3.6
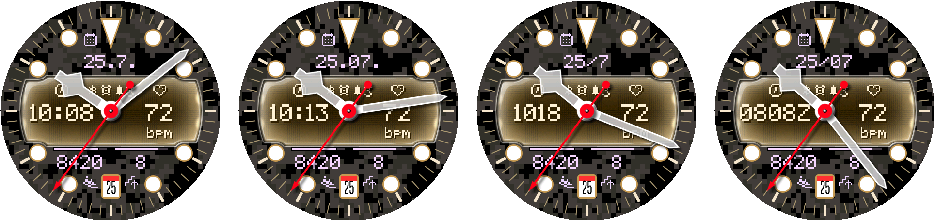
AM/PM Indicator
Shows or hides the AM/PM suffix for compatible 12-hour formats.
Examples: 10:08, 10:08a, and 10:08p. Options: On and Off.
On the watch
Always-On Display
Brightness and visibility controls for the low-power AMOLED view.
4.1
Night-Time Dimming
Reduces AOD intensity during the configured night period.
Options: Off, Dim, and Extra Dim.
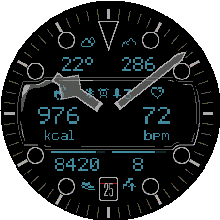
4.2
AOD Hands Brightness
Sets the low-power brightness of the analog hands.
Options: Very Low, Low, Medium, High, and Very High.

4.3
AOD Outer Data Brightness
Sets the low-power brightness of outer data values.
Options: Very Low, Low, Medium, High, and Very High.

4.4
AOD Digital Window Brightness
Sets the low-power brightness of digital-window values.
Options: Very Low, Low, Medium, High, and Very High.

4.5
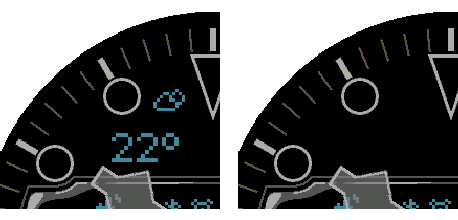
AOD Top Left
Controls the top-left field in low-power mode.
On keeps this position visible in Always-On Display; Off hides it to reduce low-power content.
4.6
AOD Top Center
Controls the digital-window center in low-power mode.
On keeps this position visible in Always-On Display; Off hides it to reduce low-power content.

4.7
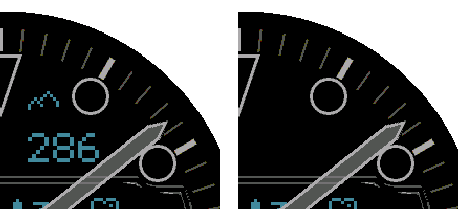
AOD Top Right
Controls the top-right field in low-power mode.
On keeps this position visible in Always-On Display; Off hides it to reduce low-power content.
4.8
AOD Digital Window Left
Controls the digital-left field in low-power mode.
On keeps this position visible in Always-On Display; Off hides it to reduce low-power content.
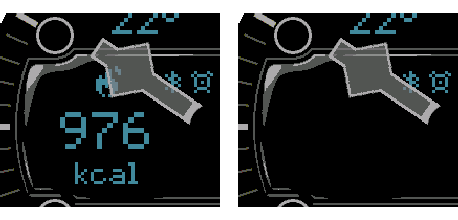
4.9
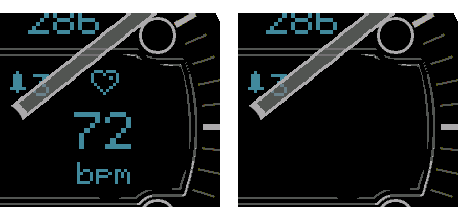
AOD Digital Window Right
Controls the digital-right field in low-power mode.
On keeps this position visible in Always-On Display; Off hides it to reduce low-power content.
4.10
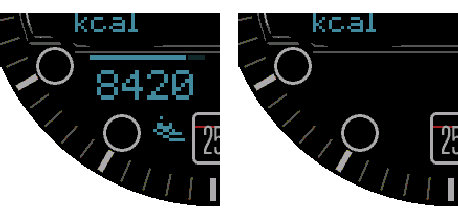
AOD Bottom Left
Controls the bottom-left field in low-power mode.
On keeps this position visible in Always-On Display; Off hides it to reduce low-power content.
4.11
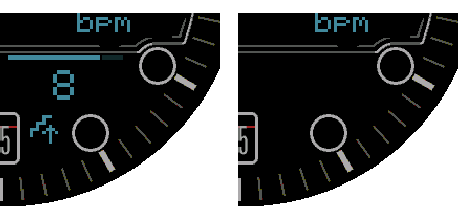
AOD Bottom Right
Controls the bottom-right field in low-power mode.
On keeps this position visible in Always-On Display; Off hides it to reduce low-power content.
On the watch
Weather
Weather source, refresh timing, status, and recovery actions.
5.1
Weather Source
Switches between the device weather service and OpenWeatherMap.
Options: Garmin Weather and OpenWeatherMap. OpenWeatherMap also requires an API key entered in Connect IQ.
5.2
Weather Refresh Interval
Sets how often OpenWeatherMap data may refresh.
Options: 15, 30, and 60 minutes.
5.3
Weather Status
Shows the current weather state and the latest successful or attempted update.
This is a read-only status action; it does not change the watch-face appearance.
5.4
Clear Cache
Deletes stored OpenWeatherMap data and retry state.
Use this after changing source or API credentials when stale data remains.
5.5
Refresh Data
Requests an immediate refresh of the data currently used by the watch face.
Availability still depends on connectivity, permissions, and provider limits.
On the watch
Battery
Low-battery behavior threshold.
6.1
Low Battery Threshold
Chooses when Crosswind switches to its low-battery behavior.
Options: Off, 5%, 10%, 15%, and 20%.
On the watch
Reset Defaults
Restore the original Crosswind configuration.
7.1
Confirm Reset
Resets all saved appearance, data, date/time, AOD, weather, battery, and touch choices.
Confirm Reset applies the defaults; Cancel leaves the current configuration unchanged.
In the Connect IQ app
Appearance
Colors, dial rendering, hands, markers, the digital window, and outer data.
1.1
Accent Color
Sets the primary highlight used throughout the dial.
Options: Teal, White, Warm White, Green, Yellow, Amber, Orange, Coral Red, Pink, Violet, Blue, and Ice Blue.
1.2
Face Render Mode
Changes the rendering character of the complete dial.
Options: Default, 8-bit, and AOD-like.
1.3
Background
Selects the plain or patterned dial background.
Options: Black and Camo.
1.4
Camo Brightness
Controls the intensity range of the Camo background.
Options: 20–25%, 20–30%, and 25–30%. The setting is visible only when Background is Camo.
1.5
Camo Color Method
Selects how Camo colors are derived from the current Accent Color or chooses a fixed palette color.
The derived methods calculate their Camo color pair from Accent Color. Options: Channel Rotate, Reverse Rotate, Complementary, Split Complementary, Triadic, Monochrome, plus all 12 palette colors. Background must be Camo.
1.6
Hand Style
Selects the shape and visual weight of the hour and minute hands.
Options: Type 1, Type 2, and Type 3.
1.7
Hour & Minute Hand Color
Sets the shared color of the hour and minute hands.
Options: Teal, White, Warm White, Green, Yellow, Amber, Orange, Coral Red, Pink, Violet, Blue, and Ice Blue.
1.8
Second Hand Color
Sets the seconds hand independently from the main hands.
Options: Red, Accent, five Camo-derived methods, and all 12 palette colors.
1.9
Lume Marker Color
Sets the color of the luminous hour markers.
Options: Teal, White, Warm White, Green, Yellow, Amber, Orange, Coral Red, Pink, Violet, Blue, and Ice Blue.
See Fig. 1.10 under Second Hand Color for representative marker colors.
1.10
12 o'clock Marker Color
Sets the color of the prominent 12 o'clock marker.
Options: Teal, White, Warm White, Green, Yellow, Amber, Orange, Coral Red, Pink, Violet, Blue, and Ice Blue.
1.11
6 o'clock Marker
Chooses the information shown around the 6 o'clock marker.
Options: Date + Battery, Date, Battery %, Battery gauge, and Simple.
1.12
Digital Window Mode
Changes the background intensity of the central digital window.
Options: Default and Darker.
1.13
Outer Data Layout
Distributes the color or color pair selected by Outer Data Color across the four outer data slots.
Uniform gives every slot the same color. Top/Bottom gives the two top slots one color and the two bottom slots the other. Left/Right groups the left and right slots. Diagonal gives each opposite diagonal pair the same color.
Options: Uniform, Top/Bottom, Left/Right, and Diagonal.
1.14
Outer Data Color
Chooses the color or derived color pair used by the outer data slots.
Accent and the 12 fixed palette choices use one color. The five derived methods calculate a color pair from Accent Color; Outer Data Layout then determines how that pair is distributed. Options: Accent, five Camo-derived methods, and all 12 palette colors.
1.15
Data Layer Position
Controls whether data values and icons are rendered below or above the analog hands.
Options: Below Hands and Above Hands. Progress bars always remain below the hands. Above Hands adds a dark color-matched shadow to outer values and icons for legibility.
In the Connect IQ app
Data
Representative metric categories, row density, six configurable fields, digital-center content, and touch launch actions.
2.1
Touch Enabled
Enables or disables all touch shortcuts.
Options: On and Off.
2.2
Top Row Mode
Controls how many fields are visible in the top row.
Options: Off, Single, and Double.
2.3
Top Left Field
Chooses the metric shown in the top-left position.
Choose from 63 fields grouped as Activity, Health, Date & Time, Training, Weather, and System. See the shared field catalog at the start of the Data chapter for representative fields from every group.
2.4
Top Left Launch Action
Chooses what opens when the top-left field is touched.
Options include Auto, supported Garmin apps and glances, External Complication, and None where the selected target is unavailable.
2.5
Top Right Field
Chooses the metric shown in the top-right position.
Choose from 63 fields grouped as Activity, Health, Date & Time, Training, Weather, and System. See the shared field catalog at the start of the Data chapter for representative fields from every group.
2.6
Top Right Launch Action
Chooses what opens when the top-right field is touched.
Options include Auto, supported Garmin apps and glances, External Complication, and None where the selected target is unavailable.
2.7
Digital Window Left Field
Chooses the metric shown on the left side of the digital window.
Choose from 63 fields grouped as Activity, Health, Date & Time, Training, Weather, and System. See the shared field catalog at the start of the Data chapter for representative fields from every group.
2.8
Digital Window Left Launch Action
Chooses what opens when the digital-left field is touched.
Options include Auto, supported Garmin apps and glances, External Complication, and None where the selected target is unavailable.
2.9
Digital Window Center
Chooses the content in the center of the digital window.
Options: Status Icons, Digital Time, Zulu Time, Date, and Seconds.
The selected content automatically moves between the upper and lower part of the digital window according to the hour and minute hand positions.
2.10
Digital Window Right Field
Chooses the metric shown on the right side of the digital window.
Choose from 63 fields grouped as Activity, Health, Date & Time, Training, Weather, and System. See the shared field catalog at the start of the Data chapter for representative fields from every group.
2.11
Digital Window Right Launch Action
Chooses what opens when the digital-right field is touched.
Options include Auto, supported Garmin apps and glances, External Complication, and None where the selected target is unavailable.
2.12
Bottom Row Mode
Controls how many fields are visible in the bottom row.
Options: Off, Single, and Double. See Fig. 2.07 under Top Row Mode.
2.13
Bottom Left Field
Chooses the metric shown in the bottom-left position.
Choose from 63 fields grouped as Activity, Health, Date & Time, Training, Weather, and System. See the shared field catalog at the start of the Data chapter for representative fields from every group.
2.14
Bottom Left Launch Action
Chooses what opens when the bottom-left field is touched.
Options include Auto, supported Garmin apps and glances, External Complication, and None where the selected target is unavailable.
2.15
Bottom Right Field
Chooses the metric shown in the bottom-right position.
Choose from 63 fields grouped as Activity, Health, Date & Time, Training, Weather, and System. See the shared field catalog at the start of the Data chapter for representative fields from every group.
2.16
Bottom Right Launch Action
Chooses what opens when the bottom-right field is touched.
Options include Auto, supported Garmin apps and glances, External Complication, and None where the selected target is unavailable.
In the Connect IQ app
Date & Time
Time and date formatting, alternate zones, display offset, and AM/PM.
3.1
Time Format
Controls the formatting of digital time values.
Options: 9:05, 09:05, Military, and Zulu.
3.2
Date Format
Controls how date fields are written.
Options: 5.7., 05.07., 5/7, 05/07, 7/5, 07/05, Day Month, Month Day, Weekday Day, and Day Weekday.
3.3
Alternate Time Zone 1
Sets the UTC offset used whenever a data slot is assigned to the Alternate Time Zone 1 field.
Options run from UTC−12:00 to UTC+14:00 in 30-minute increments.
3.4
Alternate Time Zone 2
Sets the UTC offset used whenever a data slot is assigned to the Alternate Time Zone 2 field.
Options run from UTC−12:00 to UTC+14:00 in 30-minute increments.
3.5
Displayed Time Offset
Moves the displayed hands and regular digital time ahead without changing the device clock.
Zulu time always shows actual UTC and does not use this offset. Options: +0, +5, +10, +15, +20, +25, and +30 minutes.
3.6
AM/PM Indicator
Shows or hides the AM/PM suffix for compatible 12-hour formats.
Examples: 10:08, 10:08a, and 10:08p. Options: On and Off.
In the Connect IQ app
Always-On Display
Brightness and visibility controls for the low-power AMOLED view.
4.1
Night-Time Dimming
Reduces AOD intensity during the configured night period.
Options: Off, Dim, and Extra Dim.
4.2
AOD Hands Brightness
Sets the low-power brightness of the analog hands.
Options: Very Low, Low, Medium, High, and Very High.
4.3
AOD Outer Data Brightness
Sets the low-power brightness of outer data values.
Options: Very Low, Low, Medium, High, and Very High.
4.4
AOD Digital Window Brightness
Sets the low-power brightness of digital-window values.
Options: Very Low, Low, Medium, High, and Very High.
4.5
AOD Top Left
Controls the top-left field in low-power mode.
On keeps this position visible in Always-On Display; Off hides it to reduce low-power content.
4.6
AOD Top Center
Controls the digital-window center in low-power mode.
On keeps this position visible in Always-On Display; Off hides it to reduce low-power content.
4.7
AOD Top Right
Controls the top-right field in low-power mode.
On keeps this position visible in Always-On Display; Off hides it to reduce low-power content.
4.8
AOD Digital Window Left
Controls the digital-left field in low-power mode.
On keeps this position visible in Always-On Display; Off hides it to reduce low-power content.
4.9
AOD Digital Window Right
Controls the digital-right field in low-power mode.
On keeps this position visible in Always-On Display; Off hides it to reduce low-power content.
4.10
AOD Bottom Left
Controls the bottom-left field in low-power mode.
On keeps this position visible in Always-On Display; Off hides it to reduce low-power content.
4.11
AOD Bottom Right
Controls the bottom-right field in low-power mode.
On keeps this position visible in Always-On Display; Off hides it to reduce low-power content.
In the Connect IQ app
Weather
Provider credentials and automatic refresh timing.
5.1
Weather Source
Switches between the device weather service and OpenWeatherMap.
Options: Garmin Weather and OpenWeatherMap.
5.2
Weather API Key
Stores the API key used for OpenWeatherMap requests.
Leave empty when Garmin Weather is selected. The key is not shown on the watch face.
5.3
Weather Refresh Interval
Sets how often OpenWeatherMap data may refresh.
Options: 15, 30, and 60 minutes.
In the Connect IQ app
Battery
Low-battery behavior threshold.
6.1
Low Battery Threshold
Chooses when Crosswind switches to its low-battery behavior.
Options: Off, 5%, 10%, 15%, and 20%.